Estimating and managing a large Point of Sale campaign can seem like a mammoth task, but you can actually automate this process using your MIS and save yourself lots of time.
In this article we’re going to show you the quickest way to quote for a Point of Sale campaign by importing a CSV file to automatically create and optimize the estimates. We will then show you how you can simplify the management of the distribution and picking when it becomes an order.
Different MIS solutions will do this differently, but we’re going to show you how Tharstern does it so you can see how an MIS can help you with this challenge.

Step one: Creating estimates for a large Point of Sale campaign
When quoting for a large Point of Sale Campaign made up of multiple products, you can save yourself a lot of time by importing all of the product information required for the project straight into your MIS, rather than having to create it manually. Providing your customer has detailed the product specifications, quantities and store distributions, your system can pull through this data and instantly create a table of products that make up this project.

You now need to map the fields in the imported data to the fields in the MIS. This is a pretty simple process which just involves telling the MIS which of the columns relates to which field in the MIS. In the screenshot above you can see fields that are mapped have a green header, and fields that are unmapped have a yellow header.
TOP TIP - For customers that send in CSV files in the same format each time, you can set up a mapping template for the import, so you can instantly import their CSV files without having to carry out this mapping process each time.
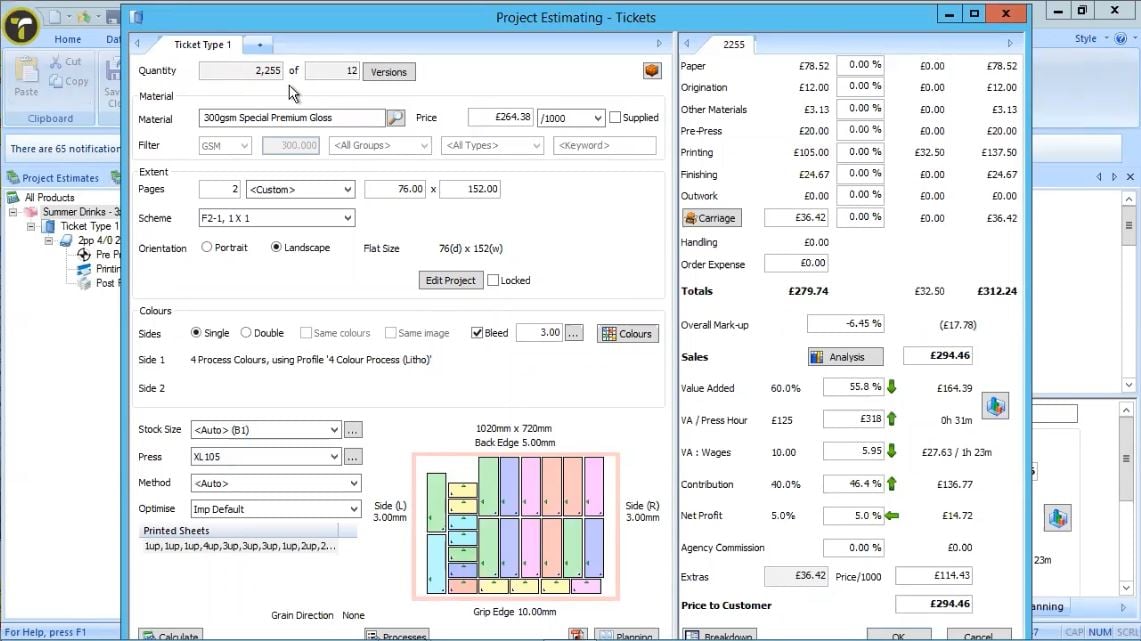
Once the project data is mapped in the MIS, it’s time to create the estimate. You can choose to create estimates for some of the products in the project, or you can select all of the products in the project.
In this example, our MIS solution is connected to the imposition software Insoft Imp, and so when we ask the MIS to create the cost estimates for the project, it automatically imposes all the products we selected onto a print ready layout alongside the cost.
By opening up the estimates, you can see this imposition layout and also the different quantities and versions involved. If the MIS has created multiple layouts, you can also view that within the estimate.
We can see on the left side of the screen below that the MIS has created 2 estimates for this project at a total price of £755.85. You can amend the price at this point to increase the mark-up or profit. And by changing this project price, the MIS will automatically pro-rata the price increase across the 2 estimates.
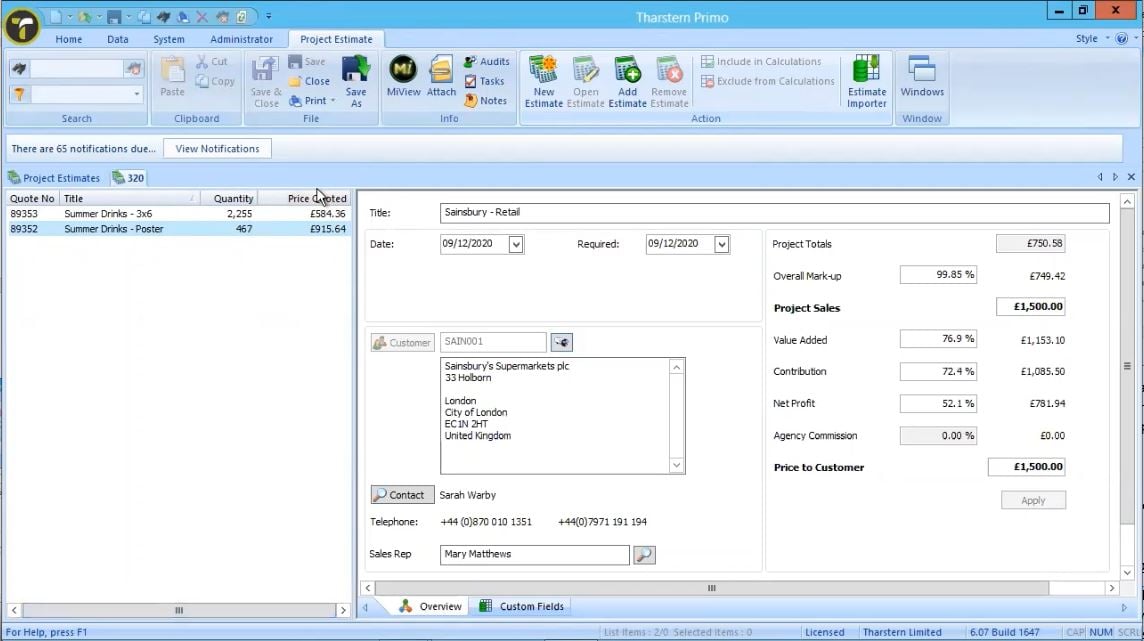
Once you're happy with the estimated costs and mark up, you can create your quote and send it on to the customer.
In this example, the whole process up to this point – taking a CSV file, creating an estimate for all those different product requirements and producing print ready imposition layouts – takes less than 3 minutes. You can see all that in action on the video link at the bottom of this page.
Step two: Converting the estimate into a job when the project is won
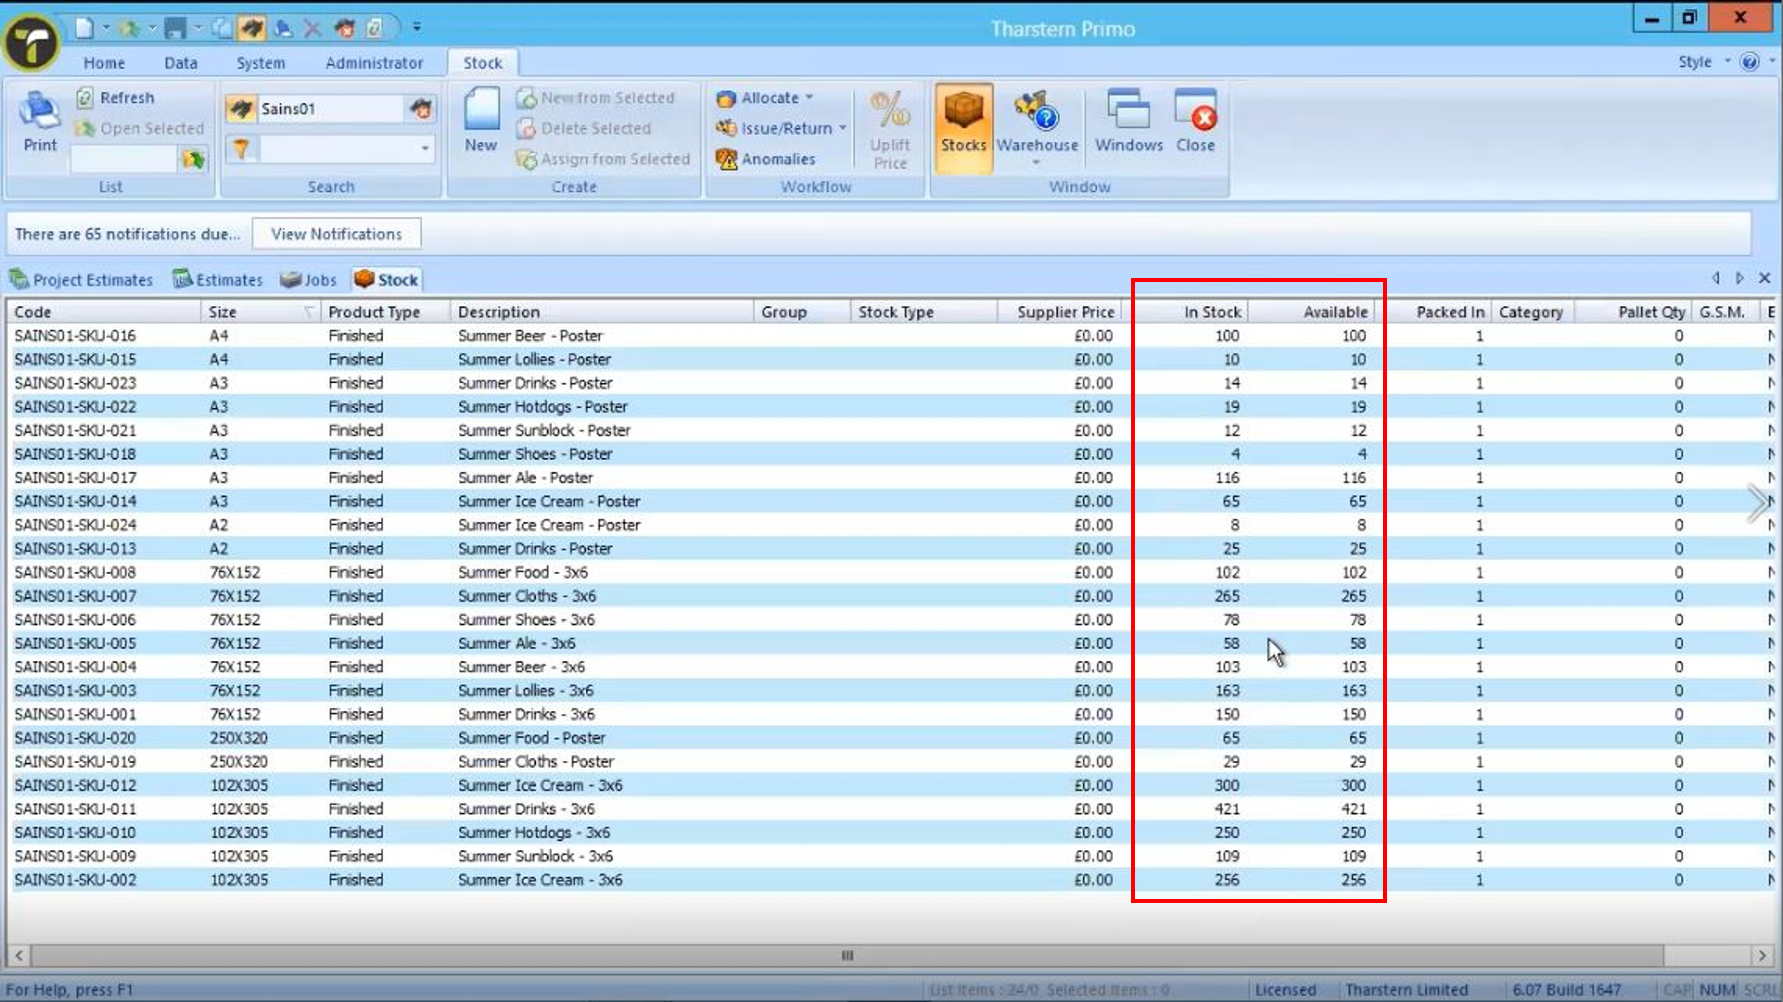
Great news, the customer accepted your quote and you can now turn those estimates into jobs in your MIS! This will prompt the SKU items to now appear in your stock and inventory system, but quantities will show at zero until the jobs are manufactured.
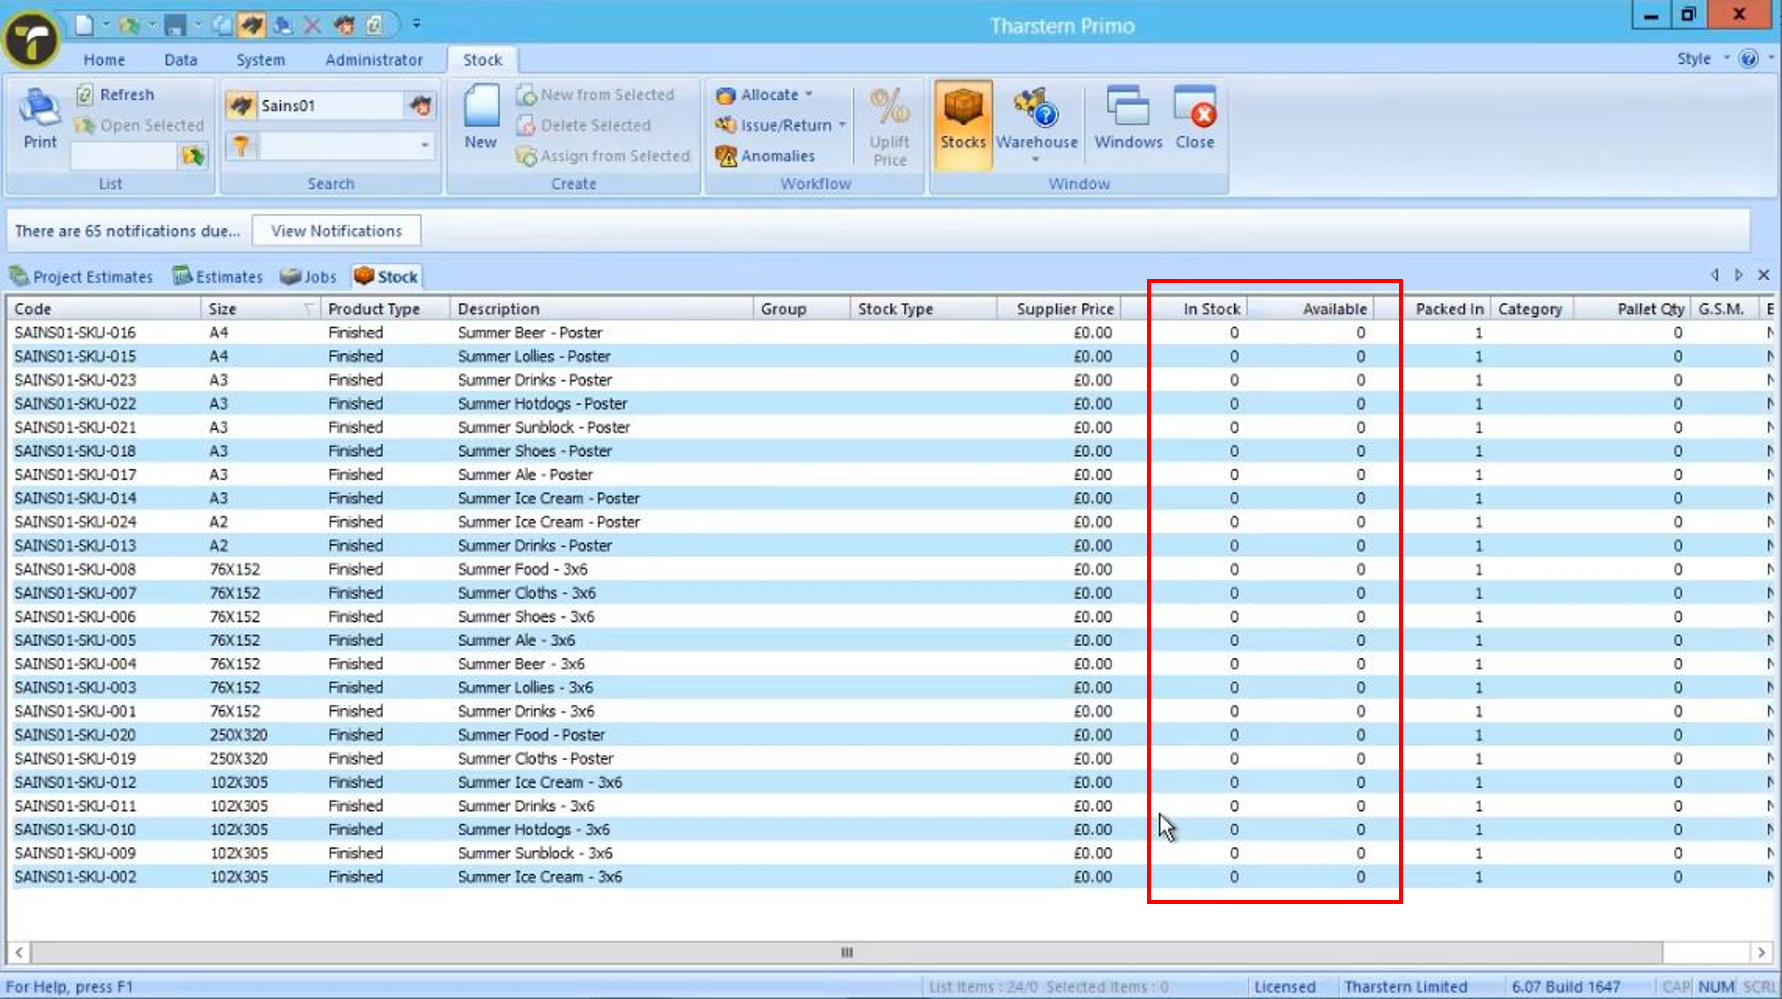
Once manufactured, the MIS will know the quantities required and will subsequently update your system to show the item in stock and ready to use.
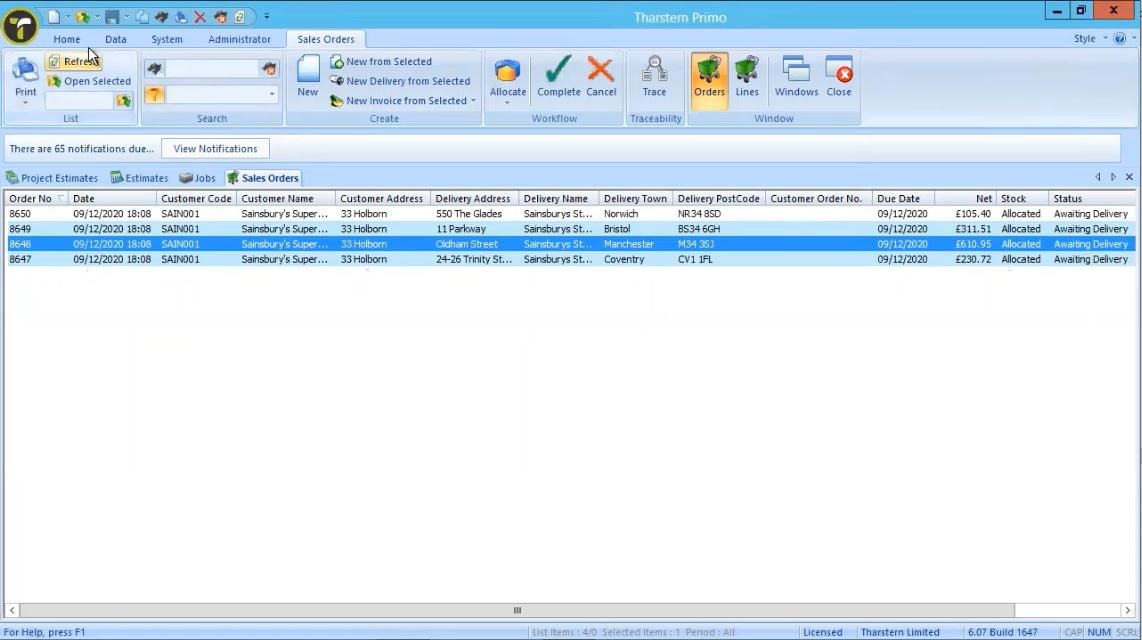
Step three: Managing distribution
It’s easy to manage the distribution of print jobs to multiple locations without having to revert back to manual changes. By taking the original CSV file that includes the store designations and dropping it into a hot folder (a network folder monitored by the software so that it knows when new data has been placed into it) the data will be imported into your MIS and sales orders will be automatically created for each location. Within each of these are the different SKU items linked to the relevant store. You can also use your imported data to create a picking list per store.
Take a look at our previous article “How to remove the pain of processing complex orders for campaigns with multiple distribution locations” to learn more about distributing large print jobs to multiple locations using this process.
By automating these processes, you’re significantly reducing the amount of time needed to quote for large campaigns like this. Estimates, jobs and sales orders can be created quickly and easily, taking away the need for manually inputting data in your MIS.
If you’d rather watch a video on this topic, take a look at the video below.
Share this

Make sure you’re quoting the best price for jobs and not losing money

4 mistakes made during MIS implementations that you can easily avoid